
Set up a Self Signed Certificate on macOS's Built in Apache
- Comments:
- 9
Update 2019-01-29: A much simpler method using a tool called mkcert has come along and I have an updated walkthrough you may want to use instead. I would recommend the mkcert method unless you have a reason you explicitly need a self signed certificate.
I recently purchased a .app domain for a side project; .app domains are interesting as they require SSL at all times.
I like to set up my dev environments as subdomains of my actual domain, such as local.donatstudios.com. It makes working with CORS and cookies a lot simpler for applications with APIs on subdomains.
Doing this with .app however means having to get SSL working. I found a number of tutorials of varying quality online, but none of them did the full process from start to finish, particularly solving problems with Chrome 58.
This tutorial assumes you are using the built in version of Apache that comes with macOS, however you should be able to adjust paths for brew or otherwise installed versions.
Creating the Certificates
First off we'll make place to do our work. We need to do this outside of sudo requiring areas due to some bugs with the Apple version of openssl.
$ mkdir /tmp/crt && cd /tmp/crtNext we will generate your key and certificate. Replace all four local.example.com entries with your full intended development subdomain.
The subjectAltName=DNS piece of this is required to get Chrome versions greater than 58 working.
$ openssl req -newkey rsa:2048 -x509 -nodes \
    -keyout local.example.com.key \
    -new \
    -out local.example.com.crt \
    -subj /CN=local.example.com \
    -reqexts SAN \
    -extensions SAN \
    -config <(cat /System/Library/OpenSSL/openssl.cnf \
        <(printf '[SAN]\nsubjectAltName=DNS:local.example.com')) \
    -sha256 \
    -days 3650
Apache requires a nopass key, so to generate this we do the following, again adjusting paths as nessessary:
$ sudo openssl rsa -in local.example.com.key -out local.example.com.nopass.keyNow that we have completed the key generation, we can move our certificates into the apache /etc directory:
$ sudo mkdir /etc/apache2/ssl
$ sudo mv *.key *.crt /etc/apache2/ssl
Apache Configuration
In your favorite editor open /etc/apache2/httpd.conf
Uncomment the following lines (line numbers may vary):
Near line 89:
LoadModule socache_shmcb_module libexec/apache2/mod_socache_shmcb.soNear line 144:
LoadModule ssl_module libexec/apache2/mod_ssl.soNear line 528:
Include /private/etc/apache2/extra/httpd-ssl.confNext open /etc/apache2/extra/httpd-ssl.conf, find <VirtualHost _default_:443> around line 121.
Either comment out using a # at the start of each line, or delete every single line between the opening <VirtualHost _default_:443> and the closing </VirtualHost> around line 290.
Presuming your sites VirtualHost is in /etc/apache2/extra/httpd-vhosts.conf either change <VirtualHost *:80> to <VirtualHost *:443>, or duplicate your VirtualHost entry using <VirtualHost *:443> if you'd like your VirtualHost accessible with and without SSL.
Next, inside your sites <VirtualHost *:443> block, append the following, adjusting the filenames accordingly.
  SSLEngine on
  SSLCertificateFile "/private/etc/apache2/ssl/local.example.com.crt"
  SSLCertificateKeyFile "/private/etc/apache2/ssl/local.example.com.nopass.key"
Chrome / Safari Configuration
Next we will open your Apache ssl directory and the "Keychain Access" application:
$ open /etc/apache2/ssl
$ open /Applications/Utilities/Keychain\ Access.app
In the Keychain Access application, select the login Keychain and the Certificates Category.
Then from the open Finder window, drag and drop your .crt file.
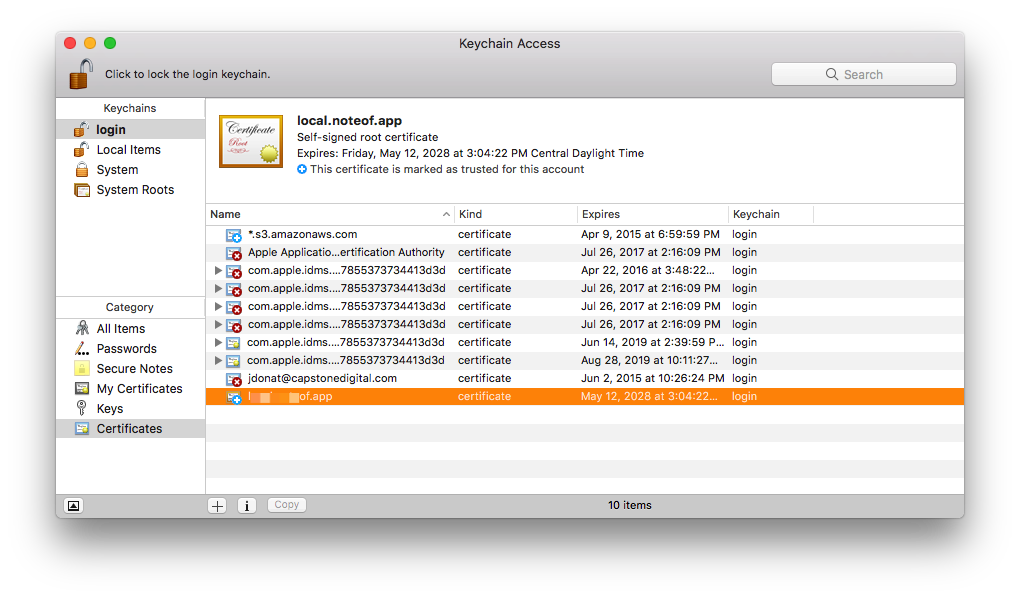
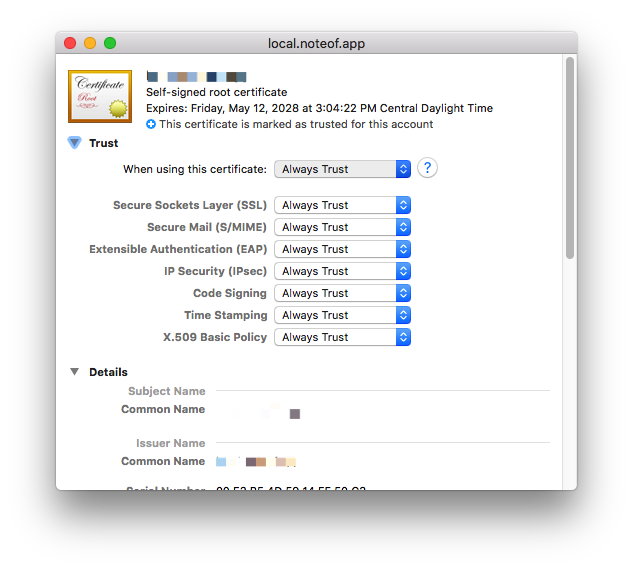
Double click, and change the settings for the selected certificate to "Always Trust".
Lastly, repeat the process of dragging and giving access in the System Keychain.
You may need to reboot, but your certificate should now work in Chrome and Safari on your local machine.
Comment by: André on
Comment by: dylan on
Comment by: Raffaele on
First off: thank for your post. It's the most accurate I've found so far.
Just a point is confusing me.
I've set up my self signed certificate on my machine, and it's generally working, at least with Safari, Chrome and Firefox, while Vivaldi (which is a chrome-engine based browser) is behaving oddly: on some sub-sites/folders it stubbornly refuses to load the page allegedly because the SSL certificate is broken (but, noticeably, only with *some* of my - not every - dev sub-site/folders).
Googling around, I stumbled upon this tech-spec by Apple: https://support.apple.com/en-us/HT210176
Well, according to what Apple says, certificates with validity longer than 825 days are rejected as invalid. But *i can* see my ssl-sites served by my local Apache server, at least with *some* browsers.
Do you have any thoughts about that?
Thanks a lot